How to Make Cloth Napkins
Step 1:
Decide on the size of napkin that you want. It is likely easiest if you choose a square size (ex: 6"x6") From there, you have two choices, cut two squares that size or one rectangle that is double the length of one side (ex: 6"x12")
Step 2:
Pin right sides together. Start sewing at one corner of the square, leaving 1/4" seam allowance. When you are a quarter of the way down that side, back tack. Lift your presser foot, and move the napkin down about two inches. Start up your sewing again and this time, sew the rest of the way around the square.
Step 3:
Trim the edges at the corners. This helps to make sure that the corners aren't bulky when you turn it right side out.
Step 4:
Using the two inch gap that you left, turn your napkin right side out. Press.
Step 5:
Stich around the outside of the napkin, once again leaving about a 1/4" seam allowance.
How to Make a Piñata Cake
**This is waaaaaaay easier than it sounds**Step 1:
Bake a cake! Divide the batter into two equal portions and bake them in identically sized pans.Step 2:
Level your cakes. I have a collection of Wilton supplies that I use frequently, including a handy-dandy cake leveller. A sharp knife and a good eye would likely work just as well.
Step 3:
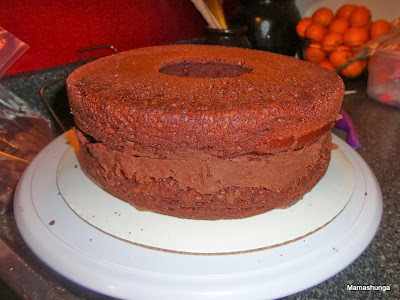
Using a large-sized biscuit cutter, cut a hole in the center of both cakes. I think an empty (preferably rinsed) can would also work. Of course, here also, you could just cut out the holes with a knife.
Step 4:
Ice the top of one of the cakes. Spread it around to cover the top evenly. It doesn't really matter if it goes over the sides.
Step 5:
Stack the other cake on top of the iced one. Place the bottom of the top cake so that it is facing up. This will reduce the amount of crumbs you encounter when icing the cake.
Step 6:
Fill up your piñata with the filling of your choice. I chose gummy worms as I was making a "garden" cake. I have also seen these filled with skittles, which would have a pretty dramatic effect when you first cut in. Keep in mind though, that a filling like that would really only work if you plan on slicing and serving the entire cake all at once. Otherwise, with the loss of the skittles when you first cut in, the rest of the cake will likely collapse.
Step 7:
Ice your cake and decorate at will. I covered my iced cake with fondant and flowers.


No comments:
Post a Comment